Monday, November 23, 2020

How to make a neem oil Insecticide


We always suggest taking an Organic approach to your garden before resorting to chemicals. Before buying a chemical insecticide, try making one with Organic and natural ingredients. In this video, we showed you how to make a neem oil insecticide with organic and natural ingredients. ​

Know this first:

When dealing with natural and organic insecticides there is no “one-size-fits-all” approach. Certain ingredients will only deter or kill certain bugs. Neem oil is used to control over 200 varieties of phytoph-agous insects, meaning the types of bugs that eat your plants.


Neem Oil Controls Bugs like: 

Aphids, leafhoppers, psyllids, whiteflies, scale insects, planthoppers, thrips larvae, mealy bugs, cabbage worms, mites, fungus, gnats, mushroom flies, locusts, Japanese beetle, Mediterranean fruit fly, Oriental fruit fly, Face fly, Horn fly, Housefly, Flea, Head lice, Spotted cucumber beetle, Mexican bean beetle, Colorado potato beetle, Flea beetle, Khapra beetle, Confused flour beetle, Japanese beetle, Red flour beetle, American cockroach, Bean aphid, Rice gall, midge, Diamondback moth, Webbing clothes moth, Gypsy moth, Corn earworm, Pink bollworm, Fall armyworm,Tobacco budworm, Tomato Hornworm, Cabbage looper, Leafminer, Serpentine leafminer, Brown planthopper, Green leafhopper, Migratory locust, House cricket, Milkweed bug, Fire ant, Boll weevil, Cowpea weevil, Rice weevil, Grasshopper, Cricket


Orthoptera insects, such as grasshoppers, crickets and locusts refuse to eat the neem oil treated plants for up to several weeks.  Phloem feeders, such as aphids are not affected by the neem oil unless it is sprayed directly on the insect. Neem is effective on thrips larvae whereas adult thrips are less sensitive to the effects. 


Benefits of making it yourself:

So before we get started, why are we making this rather than buying it? Well here’s a little secret.  If you make it yourself, you can make it stronger than they’re allowed to sell in the stores. The ratio of neem oil is strictly regulated for manufacturers of these types of products.  In fact, in some areas neem oil products are banned from being sold. Knowing this doesn’t mean we’re going to add ridiculous amounts to our concoction but we can add a splash more to make it more concentrated. A very little goes a long way. More information in the recipe below.

Ingredients:

So this recipe is super simple, all you need is...  Organic Neem Oil, water and an emulsifier.  But what is an emulsifier? Since the oil and water won’t mix together on their own, the emulsifier makes this possible. An emulsifier can be nothing more than liquid soap. Some people use silica (potassium silicate) as an emusifier because it’s more natural and has slight fertilizing properties in it. Silica is known to help the plant stand against stress and drought situations while strengthening the cell walls, leading to larger stocks and better plants. Silica also makes the plant less susceptible to fungal diseases like powdery mildew while warding away leaf-sucking insects. We tried to use silica for our recipe but it made our concoction chunky and we didn't want to clog up our sprayer. 

Product links:

The most important part of this is to get a good quality neem oil because it’ll have a high amount of Azadirachtin which is the active compound. So look for 100% pure, which might also be called “crude” or “raw”. Also get one that’s cold pressed because Azadirachtin gets destroyed by heat. 

Recipe:

The solution we’re making is 1 1/2 tsp per quart. If you wanna experiment with a stronger solution that’s fine but I wouldn’t use more than a 1/2 tsp per quart.

Add the neem oil to the water. Then add 2 tsp of emulsifier. Shake well. 

How to Use it:

Our solution is now ready to use but how do we apply it? Spray it generously on all leaf surfaces, including the undersides. Apply it in the early morning or late afternoon to prevent leaf burning. You should never apply it in direct sunlight. Do this once every 2 to 4 weeks. 

How it works:

So what results can you expect after using this? Unfortunately you probably won’t see immediate results. The way Neem Oil works is it acts as a feeding and growth disruptor, preventing the bugs from breeding. So don’t get discouraged if you don’t see results right away because it’s working on preventing a future generation of bugs. Neem oil has the following effects on insects: Disrupting or inhibiting the development of eggs, larvae, or pupae; blocking the molting of larvae or nymphs; disrupting mating and sexual communication; repelling larvae and adults; deterring females from laying eggs; sterilizing adults; Poisoning larvae and adults; deterring feeding; blocking the ability to "swallow" (that is, reducing the motility of the gut); sending metamorphosis awry at various stages.

Cautionary tips: 

Always be extra-cautious with DIY sprays. Different plants may react negatively to your solution depending on the ingredients.

So before applying this to your entire garden, spray it on a small portion of a single plant.  If everything looks good after 24 hours then you’re clear to spray the whole plant.

You can use this spray regularly as a preventative measure, especially if your garden has a history of bugs during a certain time of year. 

That’s it! Hope this helps.​​​

Monday, November 16, 2020

 How to propagate a Dragon Fruit from a cutting


  1. Things You Will Need


The best time to propagate your Dragon Fruit cuttings is in the warm summer months, this will help the cutting to root and fight off potential fungicidal infections that are more likely to happen in the wet winter months.


To begin, take a knife, the sharper the better.  Dragon Fruit grows in segments you want to take your cutting from the narrow “woody” part of the segment, this reduces surface area from the mother plant leaving a smaller area for a wound, when taking cuttings never take more then 1/5th of the parent plant, if you take more you can put undue stress on the plant which may jeopardize its health.  Don’t take cuttings from diseased or stressed plants as this can affect the quality of the cutting.


Cuttings taken from the newer portions of the plant will root better, but cuttings from older portions have better resistance to pests.


You want your cuttings to be at least 6” in length up to 15”.  You can create multiple cuttings from one segment. Just make sure you plant them the right side up, as silly as it sounds when you take a cutting and mix it up it is quite possible to plant these upside down, an easy hack is to take a sharpie and draw an arrow showing which way is up.


Make your first cut in the tender part of the cutting, this does two things, it cuts off the woody end of the plant that doesn't sprout well and it creates a greater surface area that roots will eventually grow out of.  You can cut it straight across or cut it into a V shape.


At this point it's optional to treat your cutting with a fungicide, this will help deter infections.  Place the cuttings somewhere dry and allow the wounds 3-4 days to callus over, you can tell they are done when the cut end turns white and are a little hard, it’s basically a scab for the plant.


Dragon fruit is a species of cactus that is epiphytic, that means they can pull nutrients and moisture from the air, though they still need to be planted in the soil.


To plant your cuttings you will use a traditional potting soil and I would recommend at least a 1gal size container.  At this point it's optional to apply a rooting agent, I recommend it but it is not necessary.  Dig a hole about 2-3” deep place your cutting and backfill the soil and tamp it down hard enough the kppe the cutting from falling over.


Though most cactus prefer a cactus mix which tends to be a more sandy, dragon fruit can be potted in regular potting soil.


Place the cuttings in partial shade and keep the soil moist, when you see new growth coming out of the cutting it’s time to move them into full sun, this can take anywhere from a few weeks to a few months.


At this point you can plant it in the ground.  Use a fertilizer sparingly for the first year and after a year you should see multiple shoots growing from the original cutting. You should see fruit anywhere from 12-24 months.  Just remember Dragon Fruit can get quite tall and needs good support to grow on, so take time to figure out where you want them before you plant them, they don’t like temperatures below 40 degrees.  


Tuesday, November 10, 2020

How to Use Eggshells in the Garden


Do eggshells really benefit the garden?  Since eggshells are 95% calcium, and calcium is known to be good for plants, does this mean that eggshells are good for plants?  Well, there's a right way and a wrong way to use eggshells in your garden. The most common method is unfortunately the least effective, but after you read this article, you'll know how to use eggshells in a way that's more effective than using agricultural lime!

Short Answer

It's true, eggshells can be a great source of calcium for your plants but only if prepared properly.  Eggshells act the same as using limestone which helps boost vegetable crops by increasing soil alkalinity.  This is important if the soil in your area is known to be more acidic.  


How does calcium work in plants?

Calcium is essential for root development, stem growth and foliage.  The plant uses calcium to build cell walls making the plant more rigid. The plant also uses calcium to create cellulose and starch.

Symptoms of calcium deficient plants.

Symptoms of calcium deficiency in typically appears on new growth. If the leaves are distorted or discolored between the veins, cupped leaves, premature blossom bud dropping, weak or dying stems, these is a sign of calcium deficiency.  In tomatoes specifically, the bottom of the fruit turns brown and becomes leathery in texture. This is called blossom end rot.  


How NOT to use eggshells in the garden.

Simply crushing up eggshells and putting them on your soil is useless.  The eggshells take forever to break down and will not transfer their calcium into the soil.

Not in Compost! Many people think the composting process will break down the shells but unfortunately this isn't true.  If you've been putting crushed eggshells in your compost, take a close look at the finished product, you'll notice that the shells haven't broken down.  


How to properly use eggshells in the garden.


First you need to start off by sanitizing the shells.  Put them on a baking sheet and in the oven on 200 degrees Fahrenheit for 30 minutes.  This is going to kill any lingering bacteria and salmonella. It'll also make the shells easier to grind up. 


Use a blender, coffee grinder or mortar and pestle to grind up the shells into the finest powder possible.  Doing this will allow the powder to bind to the soil, becoming readily bioavailable to the plant roots and altering the soil pH. It's important that you mix this into the soil between 4 to 10 inches deep. Use about 2 TBSP of powder (approx. 5 shells) per plant.


It's not realistic to do this process every time you use eggs. A tip is to wash off the shells immediately after cracking them and put them somewhere to dry. When you have a significant amount saved up, go ahead and make your powder.  The best part is, this stuff never goes bad so just save it for next season.


Wednesday, October 28, 2020

How to Repair a Garden Hose


Picture

​Repairing a hose is easy and inexpensive and you can do it at home in just a few minutes. A new hose can cost upwards of $90! Almost any leak can be fixed for no more than $4 with a hose repair kit.

Complete How-To Video


Hose Repair Kits

Picture

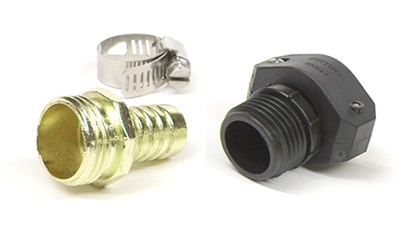
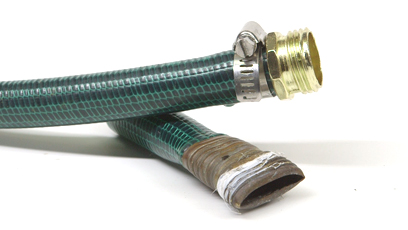
Hose Repair Kits:  Come in two different types, metal and plastic. Obviously the metal will last longer and cost more, this is recommended for horses that cost $30 or more.  For anything less then $30 typically a plastic hose end for about $2 will suffice.

Picture

First: Turn on the hose and Identify the problem area, mark it with a permanent marker. Cap the end of the hose before you turn it on because it will build up water pressure in the hose and show leaks that otherwise you might not be able to spot, such as tiny pin-holes or areas that are weak, especially if the hose likes to kink in a particular spot.

Identify the connection you need:


Female End: This is the end that connects to the facet,  will pivot freely. If there is a leak here it’s more likely that a hose washer is bad then the end needing to be replaced.  If that's the case then simply use a flat head screwdriver to take out the old washer and put in the new one. click here


Male End: The male end is the end that the water comes out of, you can attach a watering device to it like a hand sprayer or watering wand.  Here's a link to the metal male connection we used in this project click here

Inline Connector: This is for damage in the middle of the hose.  This damage can be a very simple hole or quite extensive like a dog making a chew toy of it.  Make sure to cut at least 3 inches on each side past the visible damage.  Here's a link to the inline connection that we used in this project click here

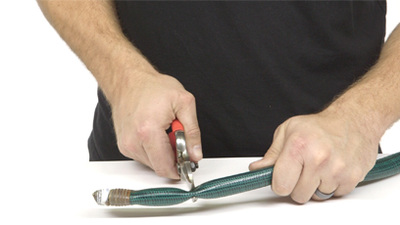
Once the problem area has been identified and marked cut the hose either using a pair of hand pruners or a sharp knife. Try to make the cut as straight as possible to ensure the best connection

Picture

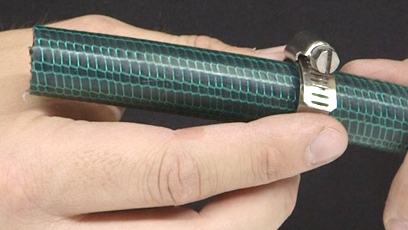
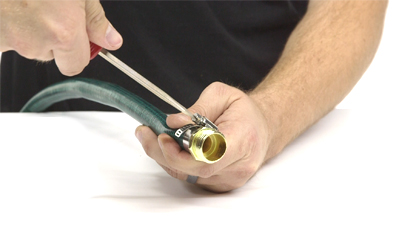
If your hose repair kit comes with a hose clamp slide that on first, if you forget it now you won’t be able to put it on later.  Some hose repair kits come with a clamp built in.

Picture

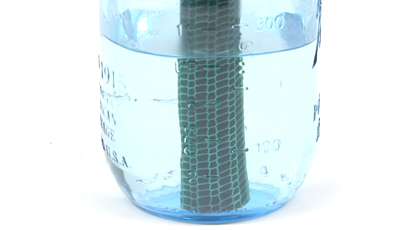
Soak the first 2 inches of the hose end in boiling hot water for :20 seconds.  The heat from the water will loosen the rubber making it much easier to slip in the repair end. As the hose cools it will re-tighten around the repair giving a stronger connection.

Picture

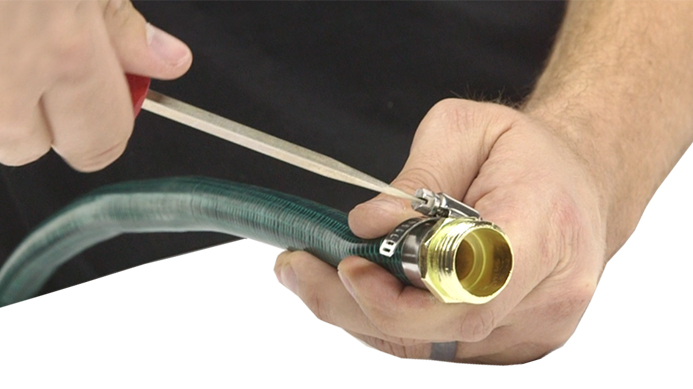
Now tighten your hose clamp, test your hose and you're done! ​

Picture


Monday, October 26, 2020

How to Pot a Plant


This method for potting a plant is the best for almost all plants in any size pot.


Watch the how-to video here!


What you need:


You only need 4 things to get this done; A pot, saucer, rock, and potting soil.  The saucer is important because it will prevent water from getting on the floor, even if your pot is outdoors this will help conserve water and keep it from getting into places it shouldn’t.


Start with your container:

Make sure you buy a pot with a hole in the bottom.  The hole will allow excess water through so that it doesn't sit in the pot and rot out your roots.  If your pot doesn't have holes, we recommend you drill or poke a hole in it, when you are drilling a hole in your pot it is very important that you are using the correct drill bit.  We recommend a mason bit and that it be very sharp, preferably as close to new as possible as you can crack terra cotta, and clay pots easily, let the drill do the cutting you don’t want to be pushing on it and applying too much pressure.  


Tip: Some Nurseries and garden centers will drill drainage holes for you if you are nervous.


Use a rock that's slightly larger than the hole. The rock will prevent soil from washing out through the hole but it won't seal it completely, which will still allow for proper drainage. For pots with multiple holes in the bottom, you can use a piece of window screen to cover the whole bottom of the pot, or you can use a couple layers of rocks, even a shade cloth or weed fabric will work.  You want something durable that still allows water to pass through it.


It's important to use a well draining potting soil.  Potting soil is typically lighter weight, and has water retaining capabilities which is important when planting in a pot.  Don't use soil from your garden outside because you don't want to introduce any potential bacteria, insects or diseases into your pot.  Here's the soil we used Kelloggs Patio Mix 


Because Pots are lifted out of the ground that makes the roots exposed to more air and sun then they would typically be if they were simply planted in the ground.  This puts a premium importance on moisture levels and water retention for our potted plants.


Start by filling the pot about half way up and lightly pat it down, this compacts the soil which minimizes settling and also eliminates potential air pockets that may have formed.


Use the small pot to measure how much soil to put in the pot.  The top of the soil line in the small pot should be two inches below the rim of the new pot. The soil line is the natural point in which a plant grows out of the ground.  We don’t want soil to be above that point because the water that is retained in the soil may start rotting the plant stem.  We leave 2 inches because it will prevent water from flowing over when watering the plant.


Grab the base of the flower and squeeze all sides of the plastic pot to release the root ball.  The smaller the plant, the more gentle you need to be.  Please don’t throw away your plastic pot. Most nursery or garden centers will gladly recycle them for you, some will even give you a credit for ones you bring back.


When you see the roots like this, it means the plant is becoming root bound.  Root bound is when the roots grow into the shape of the pot and entangle within each other. When this happens, the plant growth can become stunted and will not grow to its full potential.  In extreme cases, the plant could die.  This is why it's important to pot up your plants.


Place the plant in the pot and finish filling it up with soil, again, leaving 2 inches of space below the rim.


Give it a drink of water and you're done!   


TIP:  A good way to tell if you are watering a newly planted pot enough for the first time, you want to water a little bit, then let it settle, then water a little bit more, and let it settle and keep going until you see water coming out the bottom of the pot.  This ensures that all of the soil in the container is moist.